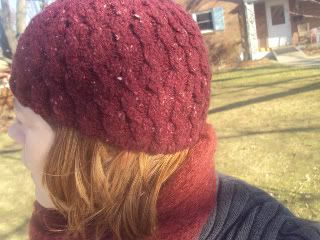
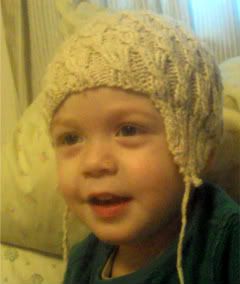
I used recycled yarn with a gauge of 7 stitches per inch. This hat can be made for all age groups. As you can see, I put ear flaps on the toddler version and didn't on the adult version. You could do flaps and ties if that is what you would like.
The yarn measured out at 14 wraps per inch, so look for a sport weight yarn.
The pattern looks difficult but it really is quite simple and should be easy to pick up once you start knitting it.
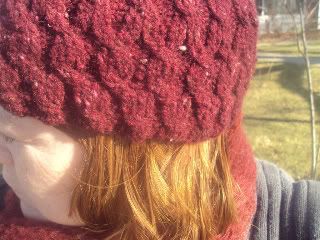
Wallis Hat
Gauge = 7 stitches per inch
Knit with 4 size 7 double pointed needles or one circular (you will need dpns for the crown decrease)
Because I give instructions for 5 different sized hats, I have noted the repeated stitches in parenthesis and state to stitch "all around" which means to continue the instructed stitches to the end of the row (where you have placed the stitch marker).
C4F = Slip two stitches on cable needle, hold in front. Knit next two stitches, then knit the two on the cable needle
T3F = Slip 2 stitches onto cable needle, hold at front of work. Perl next stitch, knit the two off of the cable needle
T3B = Slip one stitch onto cable needle, hold at back of work, knit nest two, perl stitch from cable needle
Hat Pattern
For a newborn cast on 96 stitches
For a 1 year old cast on 120 stitches
For a toddler (2 - 5 y.o.), cast on 126 stitches
For a child (5 - 12) cast on 132 stitches
For an adult, cast on 144 stitches.
Join the last stitch to the first stitch being careful not to twist the stitches. Place a stitch marker on the first stitch.
Rows 1 - 5: (K4, P2) all around
Row 6: (C4F, P2) all around
Row 7: - 11: (K4, P2) all around
Row 12: K2, then (T3F, T3B) all around
Row 13: K2, then (P2, K4) to last 4 stitches, P2, K2
Row 14: Transfer last 2 stitches from Right needle to Left needle, (C4F, P2) all around
Rows 15 - 20: (K4, P2) all around
Row 21: (C4F, P2) all around
Row 22: (K4, P2) all around
Row 23: Transfer first 2 stitches from Left needle to Right needle, K2, then (T3B, T3F)all around
Repeat 23 rows until length is about 1/2 to 1 inch shorter than you would like the hat to be.
Crown decrease
This crown decrease is for the adult hat. The smaller hats have less stitches, so you will be able to tie off the hat with fewer rows. Just follow the pattern for the adult crown decrease and once you are down to around 6 stitches, you can thread the yarn through the stitches, tie off, and you are done!
Row 1: (K1, K2tog, K1, P2, K4, P2) all around
Row 2: (K3, P2, K4, P2) all around
Row 3: (K3, P2, K1, K2tog, K1, P2) all around
Row 4: (K3, P2) all around
Row 5: (K1, K2tog, P2) all around
Row 6: (K2, P2) all around
Row 7: (K2, P2tog) all around
Row 8: (K2, P1) all around
Row 9: (K2tog, P1) all around
Row 10: (K1, P1) all around
Row 11: K2tog all around
Row 12: K all around
Row 13: K2tog all around
Thread yarn through remaining stitches and tie off tightly. You are done!
To knit on the ear flaps:
First, a Disclaimer: I sort of improvised the ear flap pattern as I went along, so if your flaps turn out either too long or slightly wonky, it is because this was my first set of ear flaps! You have been warned!
use size 7 dpns
On either side of the hat, pick up 18 stitches in the following manner (going Right to Left):
Start at the right side of a knitted rib, pick up 3 of the knitted stitches, then (1 perl, 2 knit)x4, then 1 perl, and finally 3 knit stitches.
Using this basic pattern (3 Knit stitches on either end), you can make the ear flaps wider of skinnier, depending on your preferences.
Rows 1 - 10 (or however long you want the main body of the ear flaps to be): K3, (P1, K2)x4, P1, K3
Decrease Rows: At the beginning and end of the flap on the right side, knit 2 together TWICE, then on wrong side, follow pattern as established. Continue in this manner until you are down to 4 stitches. Bind off.
Make a cord in the length of your choosing using the method of your choosing (I used braids on the toddler hat, i-cord is ok, a crocheted chain would work, too). Attach cords to flap ends using a tapestry needle.
Please let me know if you find any errors or have any problems with the pattern. I know that it's not written in an entirely traditional manner, so if you can think of ways to change it or make it more user friendly, I'm always open to suggestions. I'm just a beginner in the whole hat designing area, so it's a learning process for me. But I hope you find it easy and a fun knit! Enjoy!






4 comments:
Thank you for the pattern! I can't wait to try it :) I love your photos, they inspire me.
This is a cute design. I like the movement in the cables.
This is beautiful work and pattern! I can't wait to try it either! Question: what yarn weight did you use to obtain gauge?
Can't believe I didn't include that piece of info! The yarn measures out to 14 wraps per inch, so a sport weight yarn. If you can't find a yarn that meets these requirememnts, let me know and I'll haelp you figure out how many to cast on for your yarn gauge.
Post a Comment