Showing posts with label recipes. Show all posts

Friday, November 25, 2011

Strawberry Bavarian Cream Cake

The leftover-day-after-Thanksgiving dinner is over; I made turkey sloppy joes and they were great. But that's not what you are here for, so here we go!

Photobucket

Like I said in the last post, I saw a Strawberry Bavarian Cream Cake on $40 a Day with Rachael Ray and got the inspiration for this cake. It's sloppy but easy to make, and there are several ways that you can construct it.

You will need:

Butter cake mix
Butter cream frosting (optional, read recipe to help you decide)
2 packages of strawberries
1 can Thank You brand vanilla pudding
1 small container of Kool Whip
2 cups powdered sugar

1. Bake cake as per package directions in round cake tins (this is a layer cake). Let cool completely.
2. While cake is cooling, combine entire can of pudding, an equal portion of Kool Whip, and the 2 cups of powdered sugar. This is your Bavarian Cream.
3. Also while cake is cooling slice one container of strawberries and cut off the leaves from the other package.
4. After cake has cooled, take one of your layers and remove a shallow bowl shaped section from the top of the cake. Pour about half of the cream mixture into this section. Then top with sliced strawberries
5. Place second layer on top of first.

Here's where your options come in. At this point you can either
A. Frost cake with butter cream frosting (messy but do-able; just make sure you fill in the entire space between the two layers with frosting) and top cake with remaining strawberries. Refrigerate if not serving immediately. This will help harden the cream a bit.
B. Pour the remaining cream mixture over the cake and top with strawberries (you will have to chill this cake until the cream is harder if you aren't going to serve the cake immediately).

It is super good and drew rave reviews. My son ate close to 3/4 of the cake over the course of yesterday and today and everyone else ate the rest and was satisfied with their servings. Let me know what you think!

Wednesday, November 16, 2011

Cassoulet a Faux-Faux

Alright.  So this isn't really a cassoulet.  You don't bake it, it's a one-skillet dish.  And there's no duck confit; instead smoked sausage and prosciutto add depth of flavor.  BUT it utilizes classic elements of French cooking such as a mirepoix (a blend of carrot, celery, and onion), thyme, bay leaves, there are beans, and so it's a sort of faux cassoulet.  A cassoulet a faux-faux!

You will need:

One length of smoked sausage, sliced in bite sized pieces
8 oz of finely diced prosciutto
1-8 oz can of tomato sauce (NOT Italian, plain tomatoes)
1-8 oz can of cannellini or Great White Northern beans
1-8 oz can of navy beans
1 large carrot, peeled and sliced
2 ribs of celery, sliced
1 small red onion, diced
2 cloves garlic, finely diced
2 bay leaves
1 tsp dried thyme
1 tsp black pepper
1 TBSP dried parsley
Salt to taste

Make it:

1. Saute carrots, celery, onion, garlic, and prouscioutto in a dollop of olive oil until onion start to clear.

2. Add smoked sausage and continue to fry until the sausage starts to render its juices into the pan, about 5 minutes.

3.  Add everything else (except salt) to the pan, stir, cover, and simmer for about 15 minutes.

4. Remove the bay leaves and salt to taste.

I like to serve this with naan or a similar flat bread to sop up all of the delicious tomato sauce from the bowl.  Hope you enjoy it!


Friday, September 16, 2011

Ciao bella Chicken Cacciatore

I have a confession. I really hate chicken. It tastes gamey to me, nothing like it used to. The only way I will eat it is fried, with lots of gravy, or like this, when it has stewed in a wonderful sauce and, well, doesn't taste like chicken!

Chicken cacciatore is healthy, full of vegetables and protein, and has an earthy, satisfying flavor perfect for fall. And it is surprisingly easy to make. Just give it some time and you'll have a meal even a chicken hater will love.

You will need:
2 pounds of chicken, cut any way (I prefer strips cut into chunks)
2-16 oz cans of diced tomatoes
1-16 oz can of tomato sauce
1 package baby Bella mushrooms or portobellas cut in large chunks
1 onion cut into thin slices
1 green pepper cut into slices
1 Tbsp Italian seasoning
2 tsp sugar
2 tsp salt
2 tsp pepper
3-4 cloves garlic
1 Tbsp olive oil

Here's how it's done:

1. Add olive oil to hot pan
2. Brown chicken on all sides.
3. Add onion, pepper, mushrooms, and garlic and saute until onions are starting to look clear.
4. Add tomatoes and rest of seasonings.
5. Cover and let simmer for at least an hour, stirring occasionally. It can simmer longer if you like.
6. About 15 minutes before you are going to serve the sauce, uncover and let some of the water simmer off.
7. Practice your Italian accent while eating this fabulous dish.

I like to serve this atop angel hair pasta or spaghetti. To make it really hearty, use linguini. The sauce is a little thinner than canned sauces and doesn't cling as well to shaped pastas, but they can be used also.Enjoy!

Friday, September 9, 2011

Peanut Butter Banana Dog Treats


Dogs love peanut butter. We all know that. Peanut butter has a lot of fat. We know that too. So how about using banana for your "oil" to avoid adding more fat? We all need to do what we can to keep our buddies svelte and gorgeous while at the same time letting them know what good pals they are.

These treats are easy to make and received the Carlie seal of approval (in order to receive the Carlie seal of approval, Carlie must continue to look for more treats a full 30 seconds after it is eaten in an attempt to eat more. Quite scientific, I know. I rock that way.)

You will need:

2 cups of crunchy peanut butter
3 mashed bananas
2 eggs
1 cup water
3 cups flour

Here's how you make them:

1. Melt peanut butter in the microwave to make it more manageable.
2. Add bananas, water, and eggs and mix well.
3. Add flour, 1 cup at a time, and mix well.
4. Turn out batter onto a well greased cookie sheet and spread evenly.
5. Bake at 350F for 30 minutes.
6. Remove from oven and cut into 1" x 1" squares.
7. Return to oven and bake an additional 15 minutes.
8. Turn off oven and leave treats in it for an additional hour and a half.
9. Take the dogs to peanut butter nirvana.

With my cookie sheet I ended up with 144 treats


Tuesday, September 6, 2011

Super Delicious S'mores Bars

Before we went camping over Labor Day weekend I whipped up a batch of these super delicious cookie bars. They are really easy to make and use only a few ingredients. You might just melt into a pool of mush when you try them. They are best eaten just a little hot (or with a spoon right out of the oven, if you just can't wait).

You will need:

11 full sized graham crackers, made into crumbs in a food processor
1-1/2 cups melted butter
2 eggs
8 regular sized Hershey bars
A bag of mini marshmallows

Here's how you make them.

1. Pre-heat oven to 350F.
2. Combine melted butter, 3 cups of the graham cracker crumbs, and eggs in a large bowl. Mix well.
3. Spread mixture evenly into the bottom of a 9x13 pan.
4. Place whole chocolate bars in a single layer over the graham cracker mixture. Cover from edge to edge.
5. Spread bag of mini marshmallows evenly over chocolate.
6. Sprinkle remaining graham cracker crumbs over marshmallows.
7. Bake for about 15 minutes, check at 10. Bake until marshmallows are as brown as you would like them to be.
8. Let cool considerably, or at least until chocolate is cool enough that it wont burn your mouth to a pulp, and then eat lots of amazing s'mores bars!

Saturday, August 27, 2011

Two Easy Peasy Dog Treat Recipes

We are in the process of crate training and house training Carly and Ellie. As any dog owner knows, training always goes better with treats. I was getting store bought treats, but at the rate we are going through them, we'd have been bankrupt by the end of the week. So I took matters into my own hands and baked up some treats for my sweets. The first uses sweet potatoes and beef base and the second ground meat, after that the recipes are basically the same with a few tweaks.

Cheesy Sweet Potato Treats

You'll Need:
2 cups mashed sweet potato
1 stick butter
2-3 cups of flour
1 cup water
1 TBSP beef base
1 egg
2 cups cheddar cheese

1. Melt the butter in a large mixing bowl using your microwave.
2. Add sweet potato and egg and mix well.
3. Dissolve beef base in water then add to mixture.
4. Fold in flour one cup at a time until you form a non-sticky dough ball, similar in consistency to bread dough.
5. Fold in cheese.
6. On a well floured surface either pat or roll doug until it is approx. 1/8 to 1/4 inch thick. My small dog likes them thin, my beagle, thick.
7. Using a knife, cut the dough into 1in x 2in strips.
8. Place on well greased cookie sheets. You can place them very close together.
9. Bake at 300F for 45 min to an hour. Treats should be firm to the touch.
10. Turn off the oven and keep treats in oven for another hour and a half.
11. Give Fido a homemade treat!

Cheeseburger Treats

You'll Need:
1 pound of ground meat, your choice
1 cup of hot water
1 stick butter
2 eggs
3-4 cups flour
2 cups sharp cheddar cheese

1. Melt butter as before
2. Add ground meat and hot water to a food processor and puree meat.
3. Add meat to butter, stir together.
4. Add eggs.
5. Add flour as before until you get a nice dough ball that feels like bread dough.
6. Add cheese
7. Roll, cut, and bake as before.
8. Show Fifi how much you love her!

These treats are really crunchy, so if your dog is smaller you'll want to roll them out thinner. Carly and Ellie love them, hope your best friends do, too.

Pictures are from We Heart It, but our dogs look just the same!
Published with Blogger-droid v1.7.4

Tuesday, August 2, 2011

Chinese Chicken and Broccoli Nirvana

Last night I was craving Chinese food, but times are tight and we can't afford a trip to the local Chinese restaurant (where the food is mediocre at best). So I thought about it and realized that I had all of the ingredients for Chicken and Broccoli. It's not difficult to make but it does take some preparation. And it tastes like you got it from a Fabulous Chinese restaurant but it's not oily!

I'm going to break the recipe down into steps to make it a little more user friendly.

You need:

2 pounds chicken, get strips if you can
1 egg white
Corn starch
Water
2 TBSP Hoisin or oyster sauce
2 TBSP soy sauce
1 head of broccoli, chopped
2 cloves garlic
1/2 tsp salt
1/2 tsp sugar

Step One: Velvet Chicken

2 pounds chicken cut into small pieces (fresh chicken strips make this easy)
1 egg white
1 TBSP corn starch
1 TBSP water

Add egg white, corn starch, and water to a medium size bowl and mix well. Add chicken and make sure it gets evenly coated with mixture. Let it rest for about a half hour.

Step 2 Make the sauce

2 TBSP Hoisin or Oyster sauce
2 TBSP soy sauce
1 tsp water

Mix all this together in a small bowl
In another bowl, mix together

1 tsp corn starch
1 TBSP water

Step 3 Fry the Chicken

Into a hot wok or skillet on high place 2 tsp vegetable oil. Fry chicken in small batches until the outside is slightly brown. Place chicken on a towel to drain

Step 4 Prepare the Broccoli

1 head of broccoli, chopped
2 cloves of/garlic
1/2 tsp salt
1/2 tsp sugar
1/2 cup water

Add 2 tsp oil two wok over med high heat. Add broccoli, garlic, salt, and sugar and stir around for around 2 minutes, or until it starts to look shiny and bright green. Add water, cover pot, and let steam until tender crisp, about 3 min. Remove broccoli and dump out water

Step 5 Now the Magic Happens

Put wok back up on high, add 2 tsp oil, add chicken and broccoli together and toss until chicken is no longer pink in the middle. Add sauce mix and cornstarch/water mix to middle of wok and stir for a few seconds until sauce thickens. Stir the whole mixture together. Serve hot with rice.

Enjoy!

It looks like a lot, but it actually all cooks up pretty quickly. And it's super tasty and as far as chinese food goes pretty good for you. Try it tonight and let me know what you think!
Published with Blogger-droid v1.6.9

Monday, August 1, 2011

Easy Iced Mocha

I've been living off of iced mochas the last few weeks and have been a bit on the jittery side as a result. But they are so yummy and super easy to make! Here's how I do it:

I have one of those 24 ounce Tupperware beverage shakers that I make my coffees in. You'll need:

A packet of Starbucks Via or Nescafe coffee OR 2 tsp of instant coffee
Sugar to taste (I use 2 tsp)
Water
Chocolate milk OR chocolate syrup and white milk
Ice

Here's how easy it is:
Put packet of coffee and sugar to taste in shaker.
Add about 5 ounces of water and stir in coffee and sugar.
Add about 6 ice cubes.
Fill the remainder of the container with chocolate milk (or you could substitute a large dollop of chocolate syrup and skim milk to save calories-it's just as good).
Put lid on container and Shake it Like a Polaroid Picture.
Enjoy!

The recipe is easily tweaked to your tastes-you could use only white milk, more or less sugar, etc. Let me know what you think!
Published with Blogger-droid v1.6.9

Tuesday, July 12, 2011

Amazing Caramel Icing

Kendall had her 18th (!!!!!!) birthday this weekend and I made a devil's food cake with caramel. Icing. It. Was. Amazing. I found the devil's food cake recipe online; I just made sure that I found a recipe that used cocoa instead of chocolate that had to be melted as I've had better luck with these recipes.

Icing is Incredibly easy to make and once you make your own, you'll never go back to those pasty tubs that you find in the grocery store. Just try this Amazing Caramel Icing recipe and you will be a convert forever.

Amazing Caramel Icing

You'll need
1 stick butter
2 cups (packed) of brown sugar, light or dark.
1 cup milk
1 tsp vanilla
a bag of powdered sugar

To make it:
1. In a heavy saucepan, melt the stick of butter.
2. Add the brown sugar, milk, and vanilla to the butter and mix well.
3. Bring the mixture to a boil over Medium High heat. Stir continuously while mixture is at a boil for 3 - 5 minutes (for those of you that are candy makers, you do not want to take the caramel to the soft ball stage, but just below it.)
4. Take caramel off of heat. Let it cool for a minute or so, it will be very hot. (Resist the temptation to lick the spoon unless you'd like to eradicate your taste buds).
5. In this stage I can't be incredibly exact. I generally start with 2 cups of powdered sugar and using a low hand mixer add it to the caramel. The mixture will be very runny, but remember, it's still hot. Give it around an hour to cool and check it again. I've had to add upwards or 5 total cups of powdered sugar to the caramel to give the icing the consistency I want. I suppose you could also halve the caramel ingredients, but I'd rather have too much icing than too little.
6. Let the icing cool almost completely. Ice your Totally cool cake (if you put this on a hot cake, the butter will separate from the sugar and cause a big mess).
7. Cut yourself a Little Piece of cake - this icing is RICH!

Interestingly enough, my mom told me that my great grandmother Margery used to make this same cake as a signature cake which was what I was thinking of doing with mine. Good taste must run in the family! Enjoy!

Tuesday, January 4, 2011

New Recipe! Lightened Up Cream of Broccoli and Mushroom Chowder a la Lazarus

Today I had a hankering for Cream of Broccoli Soup, which, as we all know, is where calories go to spend the winter. All of the calories in all of the world. I was also daydreaming about the Amazing Cream of Broccoli and Mushroom Chowder that was made by a now gone piece of Columbus history, Lazarus Department Store. This store had the most incredible food. (Lucy, this one is for you!) However, like most cream soups, a serving of this has about 1000 calories, meaning that I'd get half of a cup on my current diet plan.

Sooo, I used a few lower fat cooking tricks I've picked up along the way to produce a soup that has 490 calories a serving and is rich, creamy, and really, really yummy. So you can have a grilled cheese with your soup and not fate yourself to a heart attack!


Photobucket

Lightened Up Cream of Broccoli and Mushroom Chowder, a la Lazarus

1 pound fresh chopped broccoli
8 oz mushrooms
4 oz butter
1/2 cup flour
1 quart chicken stock
1 cup 2% milk
1 cup sour cream
1 teaspoon salt
1/4 teaspoon pepper
1/4 teaspoon tarragon

1. Steam broccoli in 1 cup water until tender, about 7 minutes. Put to the side without draining.

2. Melt butter, then slowly add flour to make a roux. Cook the roux 2 - 4 minutes.

3. Add chicken stock slowly with a whisk. Bring to a boil for a few minutes to start to thicken chowder.

4. Lower heat and add the rest of the ingredients, including the undrained broccoli. You may bring the chowder to a slow simmer to further thicken the chowder if desired.

5. Get out a spoon and enjoy!

8 servings, approx. 490 calories each.

***

The trick is to cut the roux in half (the original recipe called for 8 oz of butter and 1 cup flour) and to use less half and half by replacing it with milk and sour cream. Because you are using sour cream, it will thicken the chowder, thus decreasing the amount of roux you need. If you want to further decrease calories, you can use skim milk and fat free sour cream, but this will take away some of the richness of the dish.

Wednesday, April 7, 2010

Magical Pulled Pork (aka, I Love: My Pressure Cooker)

When my grandparents died, I inherited a lot of their kitchen do-dads, pots, and pans, including their Presto Pressure Cooker from the 1950s. While they were alive, I helped them can with it many, many times. But after their death, it sat under my sink for about two year because, quite frankly, I was afraid of it.


Photobucket


If you look up "pressure cooker" on the net, you'll find all of these articles about how it is incredibly dangerous to use a vintage pressure cooker. They will split in two, they wont stay closed, they'll explode and shower you with shrapnel, give you a fatal concussion, and you'll bleed to death (okay, I made that last part up). The truth of the matter is that if the cooker has none to very minimal pitting, no cracks, a seal that isn't brittle with no cracks, and closes securely, you'll most likely be okay. OR, you could buy a new one, as it probably wouldn't cost much more than an old one. To compare different cookers, you can go here. My cooker is an 8 quart, and I can't imagine having anything smaller.

So I got brave. So far, I've made beef tips, Swiss steak, carnitas, chipotle beef, and my latest creation: Magical Pulled Pork (sorry Barbara, it's meat). I didn't really follow a particular recipe, instead, I combined ingredients from Carolina pulled pork and, of all things, Bourbon chicken.


Photobucket


Magical Pulled Pork

4 - 5 pounds pork butt
1 extremely large red onion (half minced and the other half cut in two)
1/2 cup brown sugar
1/2 cup vinegar
1-1/2 cup Coca-cola
2 tablespoons crushed red pepper flake
2 tablespoons spicy brown mustard
4 cloves garlic, minced
1 tablespoon cayanne seasoning
2 teaspoons cracked red pepper
1 cup ketchup

Heat the pressure cooker on high until it's lip is hot to the touch.

Add around 1/4 cup oil so that the food wont stick.

Add pork, brown on all sides.

Place the two quarters of red onion on the bottom of the pan. Arrange the pork on top.

Add everything else to the cooker.

Place lid, watch for a steady stream of steam to escape from the cooker. Then place the pressure indicator. Once the indicator has reached the cook position, turn the burner down as low as you can while maintaining the indicator at the cook position (this varies from stove to stove).

Cook the pork 15 minutes per pound.

Once cook time is complete, remove cooker from stove, wait for pressure indicator to drop, and remove it. BE CAREFUL. A JET OF STEAM WILL ESCAPE AND COULD SCALD YOU.

Once all steam is released, remove the lid (don't force it - if it doesn't come off easily, there is still too much pressure in the cooker.)

Stir up everything in the cooker - there will be a lot of juice.

Remove the pork butt and onions and chop up and tease apart with forks to shred it. Add in juice until the pork is as sloppy juicy as you want it.

You can add bbq sauce if you like, but it's pretty magical just like this!

Note: If you do this in a slow cooker, it should be cooked for approximately 11 hours at the medium setting. Before putting the lid on the cooker, place a sheet of aluminum foil over the opening to hold in all of the juices. The pork butt should measure 160 F when checked with a meat thermometer.


Photobucket


My picky 11 year old thought this was amazing. He told me all night long that he couldn't stop thinking about that pulled pork. I took some to a friend who had just gotten home from the hospital and got a facebook message that it was awesome. Hopefully, you'll think so, too!

Wednesday, March 31, 2010

I Love: Dessert

WARNING: The following blog post may cause uncontrollable cravings. Proceed with caution!

Photobucket

I am one of those people who believe that dessert is the best part of a meal. When I was growing up, we had dessert with every meal (which could explain my robust appearance). It wasn't until I met Tim that I learned (and this was at 32!) that not everyone eats dessert with dinner.

But I love dessert. I prefer things that are creamy and pudding like, but you'll see that there are many exceptions to this rule.

I Love:

Photobucket
creme brulee

Photobucket
ice cream

Photobucket
devil's food cake

Photobucket
banana pudding

Banana pudding was my favorite when I was a kid. I still feel like a little girl when I eat it.

Photobucket
Spotted Dick

Now I know what you are thinking and that giggling is going on. But spotted dick is really really good! If you ever get the chance to taste it, please do!

Photobucket
chocolate dipped strawberries

Photobucket
peach cobbler a la mode

Photobucket
cheesecake

Photobucket
pineapple upside down cake

Photobucket
chocolate mousse

These last two are my husband's favorite. Pineapple upside down cake is easy enough, but real chocolate mousse, since the 1970's, I've only had it in France.

MMMmmmmm. I've made you hungry, haven't I? I Love Dessert

Monday, March 29, 2010

Watch out, Paula Dean!

So I now have a header, and a beautiful one that I will be marrying this summer. It will be an outside wedding. K.

On to other news, my mom gave me an early Easter gift of a deep fryer. I've wanted a deep fryer for some time. We are trying to spend less money and I am cooking more and more. But we crave french fried, nuggets, fried fish, etc. So today what deep fryer madness day, and it was ALL GOOD.

Photobucket


Oster 2.5L Cool Touch Deep Fryer = Where have you Been All of My Life?

Tonight, I cut fries for french fries (didn't rinse them first, which I've learned makes crispier fries - they were still amazing). I bought some breaded perch, clams, and butterfly shrimp with a gift certificate I had from Barry's Perch and More here in Marysville and we has a Fisherman's Feast. It was SO SO good. I love fish. I am 3/4 Irish - doesn't fish course through Irish blood?

I was on recipezaar today looking at all of the fried food recipes. Deep fried Oreos, Mars bars, mushrooms, not to mention funnel cake, elephant ears, onion rings, I could go on. I just lost 15 pounds - I think my family might be 400# by the end of the year.

Photobucket

source

Not really, but we will have to be careful. Paula Dean is right - everything is better deep fried. There's just no way around it. All of us children of the 60's through the 80's grew up on fried food, it's ingrained into us. It's part of our cellular memory. (I just made that up, but it does sound good.)

So that's the news today. Am going to have to think of something that isn't fried to eat tomorrow!


Wednesday, March 3, 2010

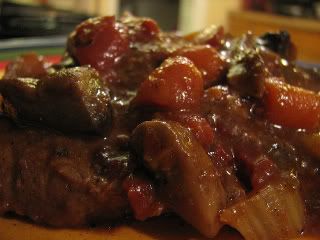
Swiss Steak Deliciousness

According to my grandfather, Swiss Steak is one of those old-timey recipes that just aren't made correctly anymore. I have been surprised at the number of people who have never heard of it (except that I wasn't surprised when Swiss people didn't know about it, or Scandinavian people in general, as it is an American name for a dish that is actually more Italian in flavor). As I've said before, it's a tradition in my family; almost everyone requested it for their birthday dinner, which was why I was so thrilled to serve it on Will's birthday.

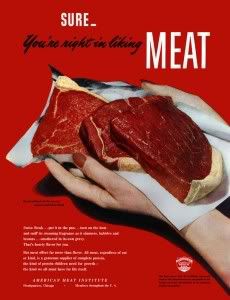
In reading about Swiss Steak on the good old Internet, I found this vintage advertisement eschewing the virtues of meat with this to say about said dish:

"Swiss Steak . . . put it in the pan . . . turn on the heat and sniff its steaming fragrance as it simmers, bubbles, and browns . . . smothered in its own gravy . . . That's hearty flavor for you."

So here's to an old-fashioned dish that's high in flavor, full of good-for-you ingredients, and that the kids will actually eat. It does take a bit of prep work and more time that your average weeknight meal, but the efforts are well worth it. Enjoy!


Swiss Steak

Prep time: 45 minutes to 1 hour 15 minutes
Cooking time: 45 minutes for pressure cooker, 5 - 6 hours for crock pot or slow cooker

You will need:

At least two pounds of higher quality beef steak or roast, at least 1 inch thick, cut into thick strips

vegetable oil*
1 tbsp salt
approximately 1 cup flour
4 carrots
2 green peppers
1 onion
3 or 4 ribs celery
4 small (14.5 oz) cans diced tomatoes
a lot of oregano
1 tsp pepper
4 tbsp Worcestershire sauce
4 tbsp soy sauce
4 tbsp Steak Sauce

* Note: This recipe cooks up best in a pressure cooker. If you don't have one, though, you can use a slow cooker or crock pot (I'll give directions for both).

1. As noted above, cut beef into thick strips. Place into a bowl, and add 1 TBSP salt, coating beef thoroughly.

2. Flour beef lightly and brown on all sides.

3. To the pan containing the beef and the drippings, add all vegetables, peeled and coarsely chopped. Mix well.

4. Add all sauces, pepper, and a very liberal sprinkling of oregano.

5. Place all ingredients in the pressure cooker. Bring cooker up to cooking stage and let cook for 45 minutes. (If using a slow cooker or crock pot, you will need to cook on High for at least 5 - 6 hours. When the meat easily falls apart, the dish is done.)

6. This dinner is traditionally served over mashed potatoes, although my mom says that it's also good over a baked potatoe.

*The vegetable oil is for browning the meat. Add it to your already hot pressure cooker and this will keep the swiss steak from sticking to the pan at clean-up.

I hope you love it as much as I do!

Saturday, February 20, 2010

Easy Peasy Pizza

I've always been intimidated by pizza crust. Anything with yeast in it just always seemed like much more work than I was prepared for. I don't know what I was thinking! This week, I decided to tackle my fear of pizza crust and found that pizza is deliciously easy!

I grew up eating at a mom and pop pizza shop called Minelli's. Do you find that the pizza you grew up on is the best pizza in the world? Well, I feel that way about Minelli's. The most pleasing thing about this recipe is that it has the crust that I grew up on. The toppings are totally up to you.

Photobucket

Pizza Crust

1 (1/4 ounce) package active dry yeast
1 cup warm water
1 tablespoon sugar
2-1/2 to 3 cups of white flour (if you want whole wheat crust, substitute 1 cup wheat flour for 1 cup of the white four)
1 teaspoon salt
1 tablespoon olive oil (I used garlic infused oil)
1 tablespoon Italian seasoning
2 teaspoons garlic powder
cornmeal for sprinkling

1. Add sugar to the warm water, then the yeast. Put aside for about 10 minutes, or until the water mixture becomes foamy.

2. In the meantime, combine 2-1/2 cups flour, salt, Italian seasoning, and garlic powder in a large bowl.

3. Put olive oil into the water/yeast mixture, then pour into dough.

4. Flour your hands, then combine all ingredients with your hands. Knead dough for 6 to 8 minutes, until it forms a nice dough ball. If this mixture is too wet, add more flour until the dough ball is no longer sticky.

5. Place dough ball into a bowl that has been sprayed with cooking spray. Let sit for 10 to 15 minutes (until dough has doubled in size.

6. When the dough has risen, divide in half.

7. Place half of dough on a liberally f1oured surface and work with your hands or with a floured rolling pin until it is the size of a 12 inch pie (or the size of your baking sheet). Sprinkle cornmeal onto baking pan, then place the dough on the pan.

8. Place dough on the top rack of your oven at 425 degrees F for 10 minutes.

9. Remove dough, then top with whatever topping you want.

10. Put back into the oven for about 10 minutes more, or until cheese is golden brown and fully melted. Let rest for 5 minutes before cutting.

Eat your yummy homemade pizzas!

Photobucket

I made a pepperoni and cheese pizza and a traditional tomato, basil, and mozzarella cheese pizza. I used marinara spaghetti sauce for the pizza sauce, but I used only about 2 - 3 tablespoons of sauce for each pizza. Of course, the beauty of pizza is that you can load it with whatever toppings you like. Want a whole wheat broccoli, garlic, and cheese pizza? Make it! I like onions, tomatoes, and basil, but I have to warn you that it smells like an old shoe! Soon, you too will be a pizza baking fool!

Saturday, November 21, 2009

The Thanksgiving Menu, a.k.a., A Cornucopia of Recipes

I'll have 9 people to feed (and maybe more) this Thanksgiving. I serve a pretty traditional menu; we have no ethnic or regional specialties that go on the Thanksgiving buffet. I thought I'd share the menu with you.

Photobucket
michellepaints, photobucket

* Turkey - of course! The thing with turkey is figuring out how big of a turkey to buy. I read in a long forgotten magazine that you want 1-1/2 pounds of turkey per person. Seems like a lot, until you figure that they turkey has a carcass and you won't get all of the meat off of that carcass. So we have been gifted with a 15 pound turkey from the in-laws. The only way to bake a turkey is in a roaster bag at 325 F, and you can refer to this handy USDA chart for cooking times:

Unstuffed
4 to 8 pounds (breast) 1½ to 3¼ hours
8 to 12 pounds 2¾ to 3 hours
12 to 14 pounds 3 to 3¾ hours
14 to 18 pounds 3¾ to 4¼ hours
18 to 20 pounds 4¼ to 4½ hours
20 to 24 pounds 4½ to 5 hours

Stuffed
4 to 6 pounds (breast) Not usually applicable
6 to 8 pounds (breast) 2½ to 3½ hours
8 to 12 pounds 3 to 3½ hours
12 to 14 pounds 3½ to 4 hours
14 to 18 pounds 4 to 4¼ hours
18 to 20 pounds 4¼ to 4¾ hours
20 to 24 pounds 4¾ to 5¼ hours

Photobucket

* Stuffing

I've always made stuffing the same way. Here's how I do it.

You'll need:
1 bag of cornbread stuffing mix.
1 cup chopped carrots
1 cup chopped celery
1 cup chopped onion
enough chicken broth (we'll address this later)
2 eggs

Sautee the carrots, celery, and onion until the carrots start to get soft. Take off of the heat, add the stuffing mix. In a seperate bowl, add some chicken broth and the eggs, whisk. Add to the stuffing mix. Add more chicken broth until the stuffing is moist. Put in a greased baking dish and cook at 325 (see how that works - you can cook it with the turkey!) for 30 to 45 minutes, or until the stuffing is done in the middle.

Photobucket
vib8022, photobucket

* Green Bean Casserole

I use Campbell's Classic Green Bean Casserole recipe. I think that's all I have to say about that.

Photobucket
HannahBear105, photobucket

* Sweet Potato Casserole

I have bought frozen sweet potato casserole from Honey Baked Ham and it's really, really good. But it's also not too difficult to make it on your own.
Kim's Sweet Potato Casserole recipe on Recipezaar.com is exactly like the recipe I've been using for years (except I don't use marshmellows. You can make up your own mind about this addition). It's the one thing that my mom requests.

Photobucket

* Glazed Carrots

Glazed Carrots are so easy to make. They are so yummy. Once you figure out how easy they are to make, you'll find yourself making them for everyday meals.

You need:
1 pound carrots
2 tablespoons butter
1/3 cup packed brown sugar

Peel and cut the carrots into bite-sized coins. Boil for 10 minutes or until just tender. Drain.

Melt butter in pan. Once melted, add brown sugar and stir until dissolved.

Add carrots and stir around to coat with glaze. Cook for an additional 10 minutes.

Photobucket
droidman, photobucket

* Potato Rolls

Save yourself some time, and buy them from the grocery store. Heat them in the microwave right before dinner for 10 seconds. Your guests will never know (as long as you hide the bag!).

Photobucket
pixiebones, photobucket

* Mashed Potatoes and Gravy

I'm not going to insult your intellegence here. I've been peeling and boiling and mashing potatoes for as long as I can remember. I think I'll do it this way, but I'm not sure. Of course, now there are many varieties of pre-made mashed potatoes that are just as great as home made. PLEASE don't used potato flakes! Oh, and I'm going to buy the gravy too.

Photobucket
lileuripop, photobucket

* PIE!!!

I'm thinking of baking my own this year, but I could just buy them, too. The menu calls for Pecan, Pumpkin, and Apple pie, lots of Redi-Whip, and Vanilla ice cream.

So are you loosening your belt just reading this? I hope you are.

Friday, April 3, 2009

The Yummiest Mexican Casserole, More Websites to Visit

The Yummiest Mexican Casserole

I love Mexican food but I get tired of making tacos every time I have a craving or my family wants them. So I was quite pleased to find a recipe on the internet that I modified and made my own (you have to improvise when you don't have all of the ingredients, you know). My 10-year-old was impressed and my husband declared this recipe "a keeper." So here's how you do it!

You will need:
1 lb ground beef or turkey
1 (16 ounce) bag of shredded cheese (I mixed Colby, Monterey Jack, and Mozzerella)
1 can whole kernel corn
1 package taco seasoning mix
1 jar of the salsa of your choice
1 (6 1/2 ounce) package of corn bread mix
1 egg
2/3 cup milk

1. Preheat your oven to 375 F.


2. Brown the meat in a large skillet.


3. While the meat is cooking prepare the corn bread: add one egg and 2/3 cup milk to the cornmeal mix and stir well.


4. When the meat is fully browned, add the corn (don't drain it), taco seasoning, and the entire jar of salsa and mix well.


5. Pour half of the corn bread mixture into a greased 9x 13 casserole. Layer half of the cheese on top. Then add your meat mixture. Cover the meat mixture entirely with the remaining corn bread mix. Top with the rest of the cheese.


6. Bake for about 25 minutes or until nicely browned.


7. Let rest for 10 minutes before serving.


8. Sigh with delight at the tasting of above casserole.

Photobucket
I don't take nice pictures of food; this one is courtesy of paltysma on photobucket.

More Websites to Visit

So what else? I have found a few new knitting sites that I think you may enjoy. See Eunny Knit is Eunny Jang's gorgeous blog about her amazing knitting. Check out this amazing Twisted Stitch Sweater. You will want to knit everything on her blog. Really.

I think I've mentioned Vogue Knitting here before. If I haven't, I have been remiss. A fellow Ravelry member left a post about this page of stitch patterns on Vogue Knitting's website. I love cables and am always happy to have a few more cable patterns to play around with.

I just found this great new e-zine Knotions. It seems to be competing with Knitty, but the thing I like about this site is that I came across quite a few plus-sized patterns that were actually cute! I'd like to knit the Oak Leaf Socks when I want a break from my current sweater project (which is going swimmingly, by the way). Anyhow, enjoy!

Friday, November 7, 2008

Nummy Chicken Tacos, Family Pictures

I haven't posted any recipes lately and this one is so easy that I'm almost embarrassed at the total uncomplicatedness of it. But it is really, really good and required almost no effort at all. Do you like chicken tacos? You'll love this.

Photobucket

Chicken for Tacos

1 lb of chicken
1 package of taco seasoning

Wake up in the morning and put the two ingredients in a crock pot or slow cooker on low. Put just a titch of water on it so that it doesn't dry out. Let it cook all day. Eat some delicious chicken for dinner.

This recipe is my husband's friend Tony's. It is much better than roasting or baking the chicken and then adding the seasoning later. The chicken falls apart and is easy to shread. The one downside to this recipe is that the chicken is really juicy to the point of runniness. If you don't like this sort of thing, I'd suggest straining the chicken before serving.

Random Family Stuff

Kendall is progressing along well with her figure skating. She recently placed 3rd in her division (Freeskate One; she's since passed Freeskate Two) at a regional skating competition. Here she is practicing her scratch spin before the competition.

Photobucket
She's fast, so it's blurry.

I was running errands in the car the other day and I looked back at Will asleep in his car seat. I realized that his sweet face was changing daily and if I didn't start taking pictures, it would be lost forever in the sands of time. So here's the picture that I took of my sweet baby asleep.

Photobucket
I really am a lucky mommy. He is as sweet as he looks.

Friday, August 15, 2008

Ohio Luau / Super Delicious Pineapple Upside Down Cake

Today was the celebration for the 10th anniversary of The Wings Enrichment Center. I have been volunteering at Wings since November of 2007 and have met wonderful, amazing people. At Wings "Union County residents facing mental health issues make plans, achieve goals, and have productive, happy lives. Wings provides a place to turn for groups, activities, and support." Volunteering there really has been one of the best experiences of my life. So anyhow, to celebrate, we had a luau. A luau in Ohio is an interesting affair; for starters, it was held in a Baptist church that was a former steak house/bar, and still houses a beer distillary (yes, I am aware of the irony of a distillary being in the same building as a Baptist church - I grew up Baptist). The food was great, your typical Midwestern church potluck with shredded pork and chicken sandwiches, scalloped potatoes, baked beans, and endless salads of various mayonnaise variations. There was Beach Boys music and leis and beach balls and various beach accoutrements and much hilarity and a good time had by all.

Photobucket
If you guessed that this isn't Ohio, you were right

I volunteered to take a pineapple upside down cake, which I had never made, but, as you may have gathered by now, I'm up for trying anything at least once (click the link for the recipe). This cake is superb. If I hadn't have been expected to share, I could have possibly eaten the whole thing myself. And it really is easy to make, once you get past the whole making caramel step (which really is simple). The only variation that I made to the recipe was that instead of using water as instructed on the cake mix box, I used the drained pineapple juice. Can you say "Yummy!?" And one other great thing; my son (who I have mentioned had a thing for cookbooks) has finally decided he wants to learn to cook and bake. So he made the large portion of the cake. My husband and I have told Collin that if he truly learns to cook, the girls will be amazingly impressed; Collin has duly noted this (he is already a ladies man).

Photobucket

I've been running for days; I am tired. I am going to find some mind numbing entertainment on TV (Hollywood's Most Expensive Real Estate, anyone?) and veg. Have a great weekend!

Wednesday, August 13, 2008

Risotto as Meditation, Daisies

Risotto as Meditation

In an exciting development, I located arborrio rice at our local Kroger. I have never made risotto, but I really wanted to give it a try, and I have been dreaming about a wild mushroom risotto that I had at San Francisco's Puccini & Penitti. It was rich, creamy, and the most wildly delicious risotto I have ever tasted. The kids were at a water park with their grandfather for the day, so the stage was set for mommy and daddy actually being able to have an adult dinner.

I found a recipe for the risotto on Recipezaar (I sound like a broken record with the Recipezaar, but it is my go-to recipe site), but I ended up modifying it so much that I'm just going to record what I did here.

I took a few pictures of the cooking, but my photos are nowhere near the photographic genius of those on Taste Spotting, et al. In fact, they aren't great at all, but I took them, so you have to look at them.

You'll need
1 cup dry white wine (yeah, wine!)
around 8 cups of chicken broth (I used 2 cans low sodium and 2 regular)
2 yellow onions
10 - 12 ounces of wild mushrooms (shitake, baby portabella, crimini, etc)
2 tbsp chopped garlic
2 cups arborrio rice
3/4 cups good grated parmesean cheese (plus some extra for a garnish)
butter to taste
salt and pepper to taste
fresh chopped parsley for garnish

I found making risotto to be a very meditative experience. I loved it. When I first saw a chef make it on TV I thought "Stand and stir rice non-stop for 30-45 minutes? You gotta be nuts!" But it was the fastest 45 minutes I've experienced in a long time. It was wierd, it was like I became one with the process and my mind was cleared and all I though about was the stirring and adding broth and perfecting the dish.

So to make the recipe, here's what you do:

1. Pour all of the broth in a stock pot and bring it to a simmer.
2. While the chicken broth is warming, finely dice the onion, slice the mushrooms, and chop the garlic (if you do that and don't use the prechopped stuff in the bottle).
3. Heat a little olive oil in a deep skillet, then add your onions, saute until they start to appear clear, add the mushrooms and garlic and saute for around 8 minutes.

Photobucket
Good enough to eat now, but restrain yourself!

4. Add the rice, stir it around in the pan for about 2 minutes to lightly toast it.
5. Add the wine (yeah, wine!) and stir until the wine has been absorbed into the rice.
6. Now start adding your chicken broth about a cup to a cup and a half at a time and stir constantly until the broth is absorbed. Continue in this fashion until you have used all of the chicken broth. Rest assured, all of the broth will be absorbed.

Photobucket
You don't think this will absorb, do you? Well, it did!

7. Stir in the 3/4 cup parmesean cheese and a little butter. Salt and pepper to taste.
8. Serve immediately. Garnish each serving with freshly grated parmesean cheese and chopped parsley.
9. Die from the deliciousness.

A couple of notes. I believe that the risotto that I had in San Fran may have been made with red wine, perhaps a merlot. There is a possibility that beef broth was involved as well. It was so rich and the end product was actually a dark brown dish. This one is a little grey when completed.

Photobucket
I didn't take this picture. Gobitapi on photobucket did. But mine tasted better.

Daisies

I have a 70 ft border that is a combo of roses, catmint, veronica, thyme, and daisies. The daisies were so pretty this year. I have hundreds of them, but I have such a difficult time cutting them because when they are all in bloom, they look like this:

Photobucket

Now I have purple and golden coneflowers in bloom, but the purple coneflowers seem to be afflicted with some sort of mystery virus, so, unfortunately, I'm going to have to dig them out and dispose of them with the lawn clippings. Fortunately, it's not difficult to come across clippings of purple coneflowers, so all is not lost. The golden coneflowers look exactly like black-eyed Susan's but flower for much longer and get that great tall cone that all coneflowers produce. I'd recommend them for any sunny garden spot.

I'm still struggling with late summer, fall flowerers. Everything seems to quit blooming around the middle of August. I'd like to try some Boltonia, but I can't find it anywhere. I'd also like to plant some of my empty spots with goldenrod - it is so showy and does not produce allergenic pollen (a vicious myth). Next year I'd like to plant some cosmos and cloeme as well - I generally stay away from annuals, but they are so cottagey, no?
Related Posts with Thumbnails